Synology DS214se: Going under the hood
The Synology DS214se is a neat piece of kit. It’s a little white box with lights on, that just sits next to your router, magically serving files and videos around your house to whichever devices happen to be in range.
It’s aimed at the pro-sumer market: people who don’t mind installing a hard drive by hand, and don’t mind tweaking a few preferences in a web-based GUI to get things running. But who, in the end, want an appliance rather than a challenge.
Geeks, however, will quickly notice that the DS214se’s shiny white exterior and polished web interface hide what is essentially, under the hood, a tiny Linux PC. And if you’re so inclined, enabling SSH access and installing custom programs can open up entirely new possibilities for this modest, network-connected box.

Let’s get this party started
DiskStations don’t come with SSH access enabled by default, but it’s easy to turn on.
If you know your DiskStation’s IP address (in my case, http://192.168.0.6:5000), go ahead and visit it in a web browser. Otherwise, visit http://find.synology.com which will magically give you a pointer.
Log in with your admin username and password, then open up Control Panel > Terminal and tick the “Enable SSH service” checkbox. Click OK and you’re done!

Now, in a local Terminal window,1 type in ssh root@192.168.0.6, where 192.168.0.6 is the IP of your DiskStation. Press Enter, and you’ll be asked for a password. Type in the same admin password you normally use to get into the DSM web interface, and press Enter again.
If you get warned about the “Authenticity of host”, just type yes and press Enter. You’ll only be asked once.2
~:zarinozappia$ ssh root@192.168.0.6
The authenticity of host '192.168.0.6 (192.168.0.6)' can't be established.
RSA key fingerprint is 5a:87:03:be:dc:e9:f9:f5:fd:c2:48:b9:e4:67:80:f8.
Are you sure you want to continue connecting (yes/no)? yes
Warning: Permanently added '192.168.0.6' (RSA) to the list of known hosts.

root@192.168.0.6's password: *********

BusyBox v1.16.1 (2013-11-06 05:34:59 CST) built-in shell (ash)
Enter 'help' for a list of built-in commands.

diskstation>
With any luck, you‘ll be given a command prompt (diskstation>) on the remote machine. You’ll be dropped into an empty directory called /root – the root user’s home directory. Your hard drive volumes are accessible at /volume1, /volume2 etc, and any USB drives you’ve got plugged in are accessible at /volumeUSB1.
Space is at a premium on the DS214se’s internal disk, so instead of the more common, fully-featured bash, it uses ash. All your usual commands (like cd and ls) work fine, but niceties like Ctrl-R command history search, and !!/!$ substitutions don’t.
Likewise, if you’re after a nice, easy to use text editor like nano or joe, you’re out of luck. The DS214se ships with one editor, and one alone: vi. You can find vi crib sheets online, but the basics are: press i to start typing, esc to stop, :wq to save and quit, or :q! to quit without saving.
Cutting the faff: simple login with SSH keys and short host names
Entering a username, an IP address and a password on every login gets pretty tiring after a while. Here’s how to set up SSH key login on your DiskStation, and an SSH config file on your Mac, so you can just type ssh diskstation and start working:
Log out of your SSH session by typing Ctrl-D or exit. Then, once you’re back to your normal command prompt (ie: not diskstation>), copy the following three lines of text and paste them into your Terminal:
touch ~/.ssh/config
open ~/.ssh/config
A document will open in TextEdit. You can add settings in here that tweak how the ssh command works on your Mac. Paste the following three lines into the window (editing the IP address so that it matches your DiskStation’s) and save it:
Host diskstation
Hostname 192.168.0.6
User root
Awesome! Your ssh diskstation shortcut is all set up. Let’s put it to the test, by logging in so we can turn on SSH key authentication.
Go back to your Terminal and type ssh diskstation, then enter your password. I promise this is the last time you’ll have to do that!
Once you’re in, type vi /etc/ssh/sshd_config and press Enter. Welcome to the weird and wonderful world of vi. Use the down arrow to scroll until you see some lines starting:
#RSAAuthentication yes
#PubkeyAuthentication yes
#AuthorizedKeysFile   .ssh/authorized_keys
Press the i key to enter editing mode, then use the arrow keys and backspace key to delete the hashes, so that you end up with this:
RSAAuthentication yes
PubkeyAuthentication yes
AuthorizedKeysFile   .ssh/authorized_keys
Press the Escape key to leave editing mode, and then type :wq to save your changes. Your DiskStation will now accept incoming SSH requests, but it’ll reject you because you’ve not yet told it your SSH key.
Paste the following commands into your current Terminal window (with the diskstation> prompt):
cd /root
mkdir .ssh
touch .ssh/authorized_keys
chmod 700 .ssh
chmod 644 .ssh/authorized_keys
vi .ssh/authorized_keys
An empty document will open up in our old friend, vi. You need to paste your Mac’s SSH key in here.3 Go grab it by opening up a new Terminal window, and typing cat ~/.ssh/id_rsa.pub | pbcopy. Then go back to your original window, press i to enter editing mode (this is really important) and then just paste. The screen should look something like this:

Press the Escape key, then :wq to save and close. Finally type /usr/syno/sbin/synoservice --restart ssh (or synoservicectl --reload sshd if you’re on version 5 of the DSM operating system) to apply the changes and restart the DiskStation’s SSH service. You’ll be automatically kicked out, but when you next try to log in with ssh diskstation, you won’t be asked for a password. Score!
Installing custom command-line programs (like screen, nano and python)
The more adventurous you get, the more you’ll find yourself missing programs you now take for granted on normal computers. Like screen which lets you keep a long-running process (like a 500GB cp command) going in the background, without needing to maintain an open SSH connection throughout the whole thing.
Linux users will instantly type apt-get screen, and then be faced with the unthinkable: The DiskStation doesn’t have apt-get. In fact, is has no package manager at all. No package manager means no package manager to install a package manager ;-) So you’ll have to do this the old fashioned way, with a bootstrap script…
Bootstrap scripts are processor-specific, so once you know which processor your DiskStation has, you can head here to download the right bootstrap script.
Problem is, the DS214se (and its other cousins like the DS214 and DS213j, which also use a Marvell Armada 370 CPU) are pretty new, so they don’t yet have their own bootstrap script. Thankfully, the Armada 370 is quite similar to the Kirkwood mv6281, and there’s a bootstrap boostrap on Github, that’ll make the existing mv6281 code work on newer DiskStations.
SSH into your DiskStation, as above. Then run:
mkdir /volume1/@optware
mkdir /opt
mount -o bind /volume1/@optware /opt
Followed by:
feed=http://ipkg.nslu2-linux.org/feeds/optware/cs08q1armel/cross/unstable
ipk_name=`wget -qO- $feed/Packages | awk '/^Filename: ipkg-opt/ {print $2}'`
wget $feed/$ipk_name
tar -xOvzf $ipk_name ./data.tar.gz | tar -C / -xzvf -
mkdir -p /opt/etc/ipkg
echo "src cross $feed" > /opt/etc/ipkg/feeds.conf
To add the new /opt directory to your $PATH, type vi /etc/profile, press i and paste the following line just before export PATH:
PATH=/opt/bin:/opt/sbin:$PATH
Press Escape, then type :wq to close and save your changes. Then, finally, type source /etc/profile to reload your shell settings.
The last step is to actually download and install the optware bootstrap. I’ve put them into two Gists, to save you some typing. Just paste this into your Terminal and press Enter:
cd /etc
wget --no-check-certificate https://gist.github.com/zarino/8632360/raw/6f54c3573e22d07cf7fc68e2fcef4a50623fdff2/rc.local
chmod 755 rc.local
wget --no-check-certificate https://gist.github.com/zarino/8632372/raw/ef13804d25c2a3188dde698f7fede1f96a36c073/rc.optware
chmod 755 rc.optware
And you’re done. You’ll now be able to install packages using the ipkg command.
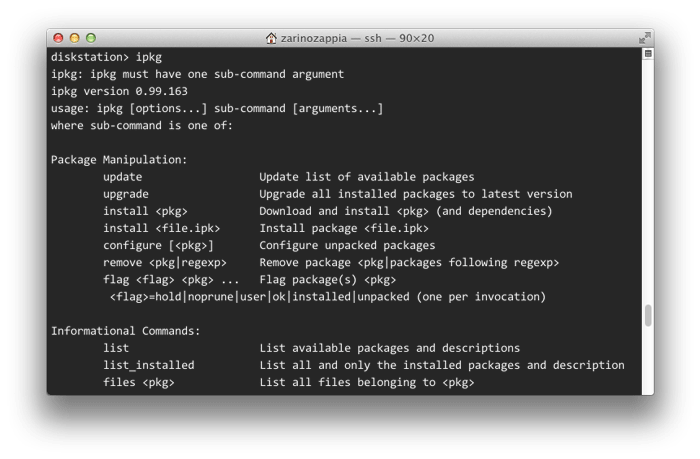
Since it’s a new install, you’ll want to run ipkg update to populate ipkg’s list of available programs. Then you can run ipkg list to see those programs, or you can find a specific package with ipkg search.
Have fun!
-
I’m a Mac user, so I get this for free, using the built-in Terminal application. Windows users might instead want to check out Putty, a free Windows SSH client. ↩
-
It turns out you can disable this host fingerprint checking entirely, for all servers, by adding a line
StrictHostKeyChecking noto your~/.ssh/config. Very tempting. ↩ -
If you don’t yet have an SSH key, run
ssh-keygen -t rsaand follow the instructions. Your key will be stored in~/.ssh/by default. ↩