Time Machine and the Synology DS214se NAS
In a previous post, I discussed the importance of backing up your data. And in another, I walked through setting up a Synology DS214se NAS from scratch.
Now it’s time to start backing up your data. Synology has its own blatant copy of Apple’s Time Machine interface, but if you’ve got a Mac, it’s worth sticking with the original and the best.
While the OS X installer can theoretcially restore your entire Mac from a Time Machine backup should your hard drive or SSD fail, it’s actually most useful for retreiving those individual files you accidentally lose or delete.
The additional benefit of putting your Time Machine backups on a network drive is that you don’t have to faff around plugging and unplugging a USB drive – Which has been a major pain for me with my MacBook Air these last few years, resulting in spans of days or weeks when Time Machine hasn’t been able to back anything up, because the USB drive hasn’t been connected.
Creating a Mac-compatible file share
So, assuming you’re following on from my previous article about setting up a DS214se, your new disks will just have finished checking. Fire up http://192.168.0.6:5000 (or whatever your DiskStation’s IP address is – the default http://diskstation.local:5000 might also work if you’re on a Mac), log in, and open the Control Panel.
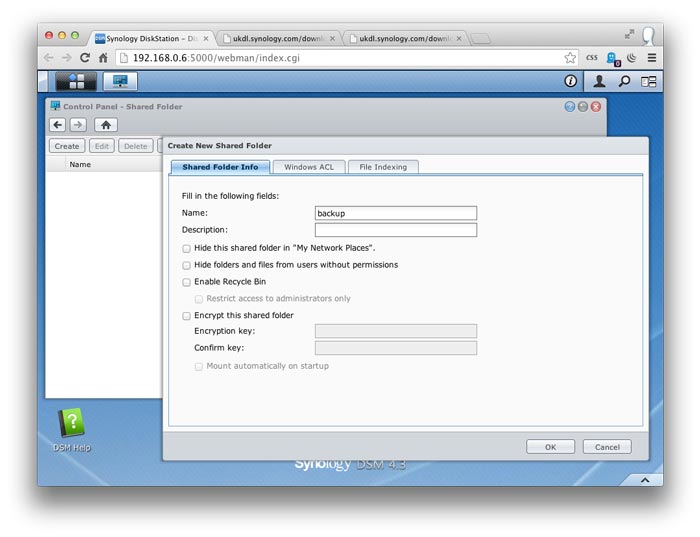
Our DiskStation’s brand new, so it doesn’t have any shared folders yet. Open the “Shared Folders” control panel, and click the “Create” button. Name your new shared folder “backup” and click “OK”. Simple as that!
DSM will ask which users should have permission to access the new shared folder. If you’re a security nut, you can just click “OK” without ticking anything, and allow access to users later as required. But most people, to keep it simple, will want to tick the “Read/Write” checkbox for the “admin” user.
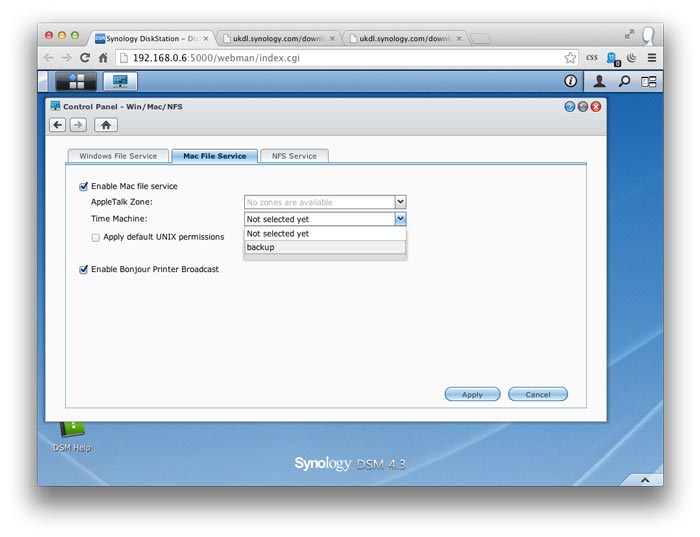
Next, head over to the “Win/Mac/NFS” control panel, click the “Mac File Service” tab, and make sure that “Enable Mac file service” is ticked and “Time Machine:” is set to our new “backup” shared folder. Click “Apply” and then “Yes” to the ridiculous warning about restarting network service.
While we could let Time Machine use the default admin user, it’s better practice to create a new user specifically for Time Machine. Creating a new user also means we can enforce a storage space quota, which will stop Time Machine from filling up our entire DS214se disk, leaving room for other files or manual backups.
Go back to the main Control Panel screen, and click “User”. Click the “Create” button and pick a name and password.

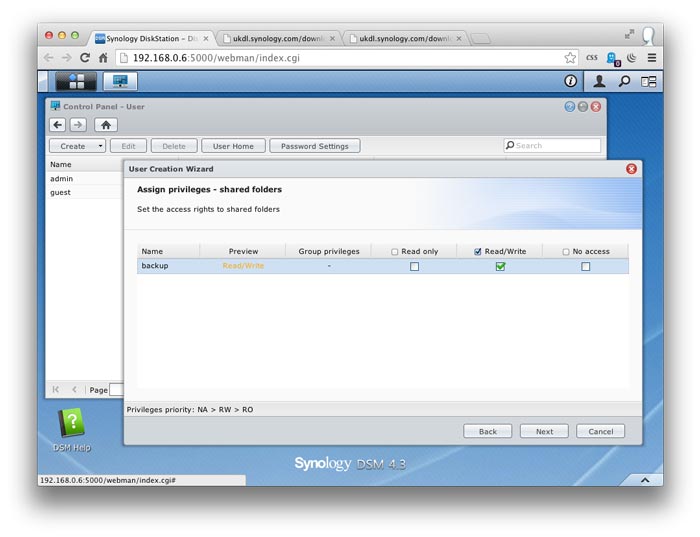
Click “Next” twice, until you see the shared folders screen. Tick “Read/Write” for the backup folder, and then “Next” again.
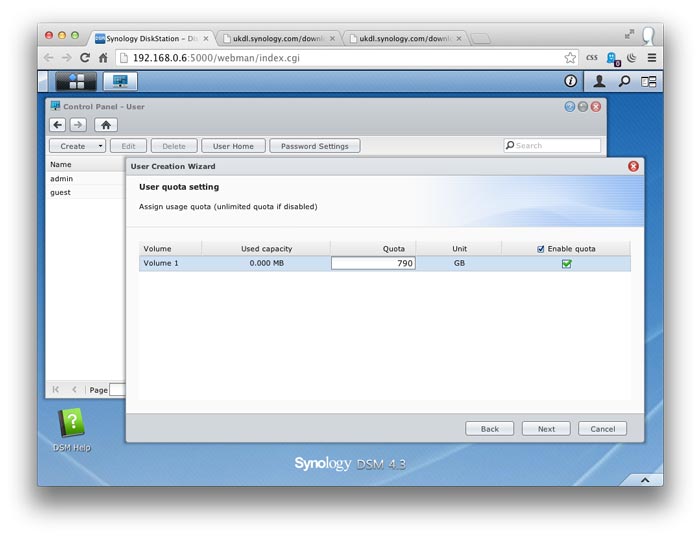
Finally, set up a quota for your Time Machine backups. Generally, Time Machine drives should be 2–3 times the size of your Mac’s hard drive or SSD. In my case, my MacBook Air has a 256GB SSD, and I’ve got 1.79TB of usable backup space (automatically mirrored, of course, onto the DS214’s second internal 2TB drive for extra safety). I want 1TB of space for backing up files on my portable USB drive, so that leaves 0.79TB to be used by Time Machine. Which is perfect, because it’s just a little more than 3 times the size of my Mac’s SSD, giving Time Machine plenty of room to store older files.
Tick the “Enable Quota” checkbox and enter a quota size (in gigabytes). Then click “Next”, “Next”, “Next” and “Apply”.
Congratulations! You’ve set up Time Machine on your Synology DiskStation. If you open System Preferences > Time Machine on your Mac, then click “Select Disk”, you’ll be able to see your new “backup” drive in the list of available drives. Select it, and enter the username and password you picked above. And everything will just work magically. The first backup can be a bit slow: in my case, backing up about 220GB of data took around 9 hours.
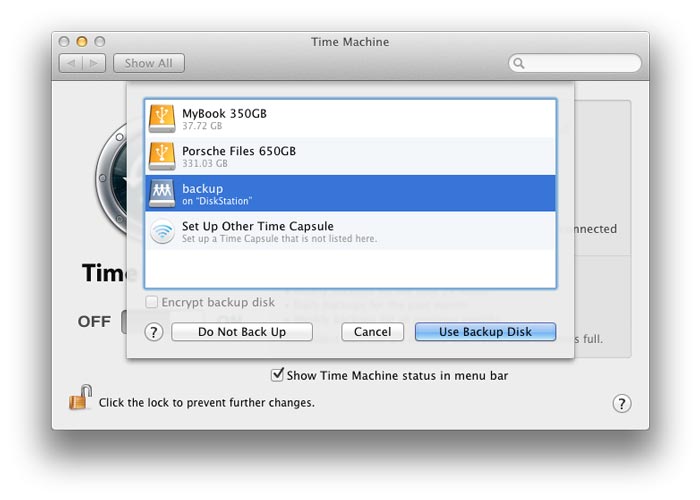
If, however, you have existing Time Machine backups you’d like to re-use, then leave System Preferences for a bit and read on…
Migrating an existing Time Machine backup
Chances are, like me, you’ve already got years’ worth of Time Machine backups on another external drive. It would be a real shame to lose that history just because you’ve started using a new backup drive.
Time Machine stores all of its data in a folder called “Backups.backupdb”. You can just copy this folder from drive to drive, and it’ll carry on working.
In our case, however, the process is a little more complicated than simply dragging a folder in the Finder. When it’s backing up to a network drive, Time Machine stores its data in a sort of fake inner drive, called a sparsebundle. Your DiskStation won’t yet have a sparsebundle in the backup folder, but we can get our Mac to make it for us. And then we can copy the old “Backups.backupdb” into it.
First, connect to your DiskStation by clicking on your Mac Desktop and pressing ⌘-K (or selecting “Connect to Server” from the Finder’s “Go” menu). Type in your DiskStation’s IP address (in my case, afp://192.168.0.6) and the “timemachine” user name and password you set up earlier.
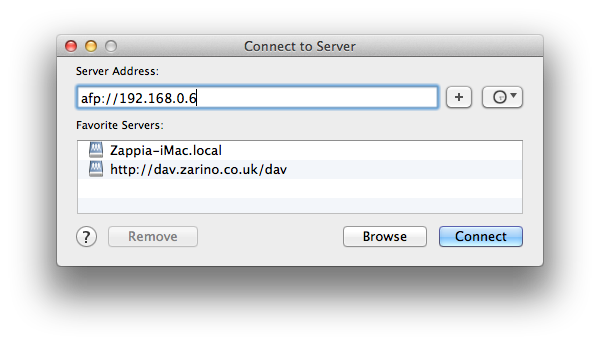
A new window will open up, showing a completely empty drive called “backup”. Keep this window open in the background.
Meanwhile, open up System Preferences > Time Machine, click “Select Disk”, and pick your “backup” drive from the list. Enter the same user name and password again, and click “Connect”. System Preferences will wait two minutes before starting a backup. (The impatient reader might want to click the Time Machine icon in their Mac’s menu bar and select “Back up now”, to speed the process along).
Once System Preferences starts “preparing” the disk, keep an eye on the Finder window you had open in the background. After a few seconds, a new file will appear in the backup drive, ending in “.sparsebundle” – once you see that, you can click the little grey cross next to the progress bar in the Time Machine preferences window, to cancel the backup. We’ve got what we wanted: a Time-Machine-approved sparsebundle.
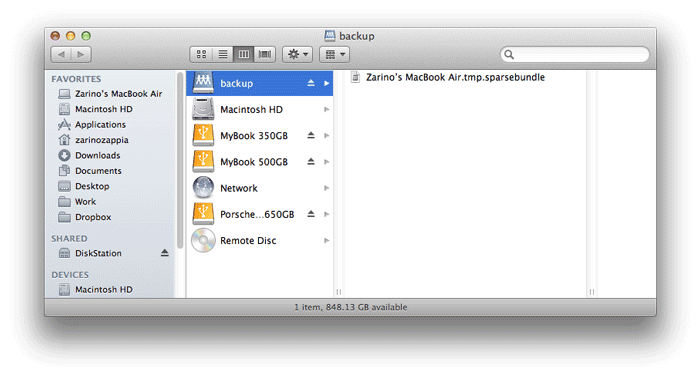
Wait for the Time Machine cancellation to finish (this might take a few minutes), then turn Time Machine off, and double-click the sparsebundle file on your backup drive. A new drive will mount on your Mac, called “Time Machine Backups”. It even has a new, empty little “backups.backupdb” inside it!

While your Mac’s pre-installed Disk Utility app can “restore” the contents of one disk onto another, it doesn’t give you very much feedback on its progress. Instead, I used SuperDuper!, which is available for free. Go download it, then open it up.
Select your existing Time Machine drive in the first dropdown menu, and the new “Time Machine Backups” drive in the second. Make sure that the cloning method is set to “Backup - all files” and click “Copy Now”.
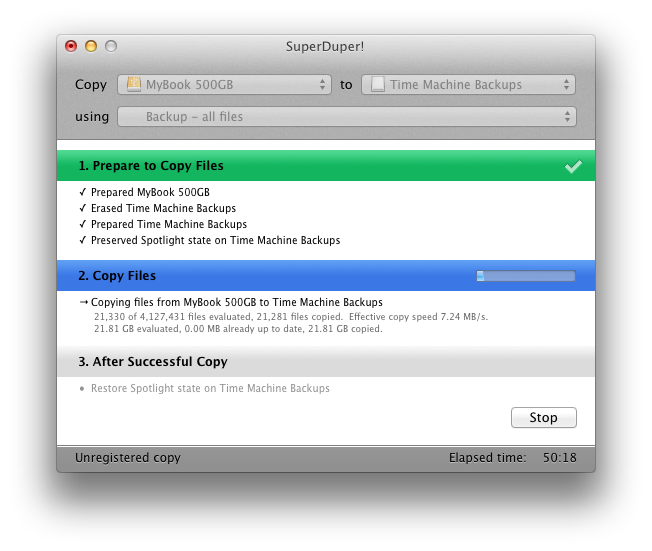
SuperDuper! gives you loads of feedback on what it’s up to. It won’t take long for you to realise this is a slooooooow process. Like, 7GB-an-hour sort of slow. So make sure to set it off at a time when you know you won’t need to uplug either your Mac or the DS214se.1
Once the copy has completed, you can return to System Preferences and turn on Time Machine backups once more.
So that’s that. Tune in later for a run-down on accessing your DiskStation over SSH, and installing custom command-line programs.
-
I imagine there’s a faster way to do this – perhaps by connecting the old backup drive directly to the DS214se via USB, then SSHing into the DS214se from your Mac, mounting the sparsebundle directly onto the DS filesystem, and doing the block-level clone via some command line program. But Linux doesn’t natively support sparsebundles, or the hard links that Time Machine uses to keep backup sizes down, so you’d need to work that out too. ↩